Now this little task sounds very simple and in theory it really should be, but this is just one of those annoying IMVU bugs that can really ruin your day.
Why would I want to uncheck a mesh ID you ask? Well, the mesh IDs are used to designate where your mesh will show up on the avatar or furniture or room. The avatar is made up of 10 basic mesh ID numbers that replace the different body parts. You can test them out by unclicking each one, then clicking "Apply Changes" to see which part disappears. For example, mesh ID 0 will cause the head to disappear and whatever mesh you are uploading will take that mesh ID spot. All meshes need to be placed in at least one mesh ID spot. The system is useful for when you want to put on a new body part. You apply a new head in client and the old one disappears. Otherwise you would have on 2 heads at the same time and that would look ridiculous. The mesh IDs for furniture and rooms are only important for that particular item. You have 99 IDs to work with and, unless you are making a very elaborate room, I doubt you'll come close to using all of the IDs up.
The only time mesh IDs are a pain in the patooty are when you are tying to apply an accessory item derived from clothing. When you make a clothing accessory item, you still have to choose a number between 11 and 99 for the mesh. Unfortunately with millions of products in the catalog, there is a pretty good chance that there will be a couple other products that use that same number and they will disappear as soon as your product is applied and visa versa.
This isn't the case for accessories derived from the main accessory product, the sunglasses. So I guess you are wondering why I don't just derive my accessories from the sunglasses. Well, there is a small issue with that. You can't add animations to those accessories. They made an empty clothing item for deriving, and that's all fine and dandy, but they don't give you the option to put that item in any accessory category in the catalog, and how are people suppose to buy your stuff if it's not filed right? The only way to get an animated accessory into any accessory catagory is to derive from a clothing item that was put in an accessory catagory before IMVU made it's new (not so new anymore) all inclusive chat and editor client....which I have.
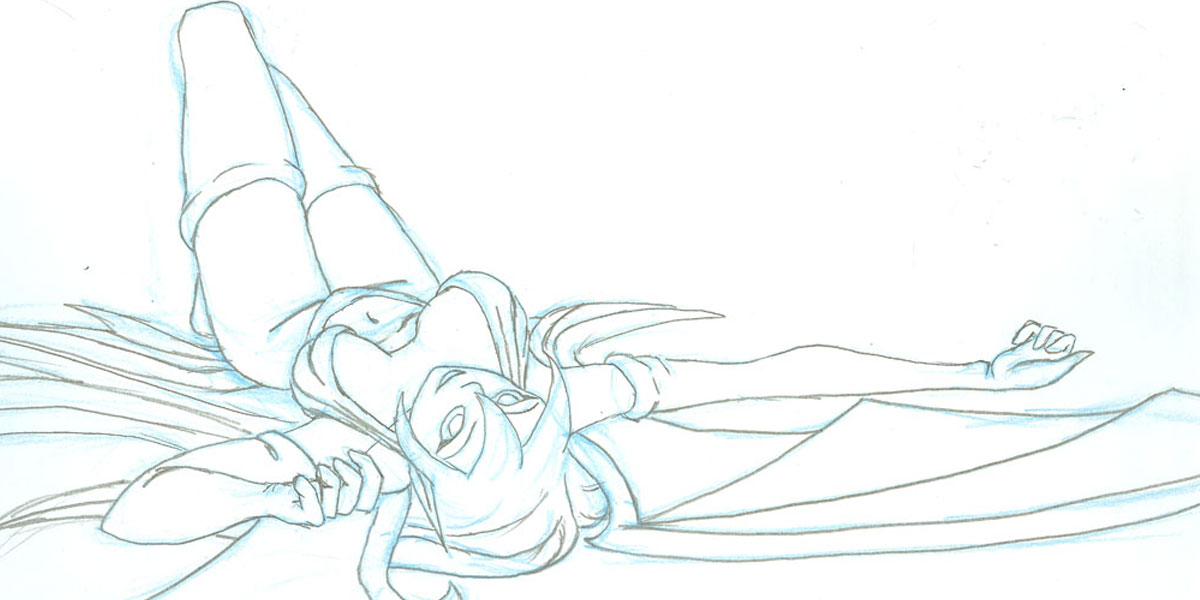
In case you wanted to derive from it, here it is. :)
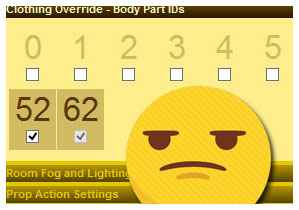
So what about that bug again? Oh yes. So you derive from my empty clothing item and you will find that the mesh ID number used in the product is 52, but you don't want 52 because you have a few other things that are already 52, so you uncheck 52 and upload your awesome pose pack only to find that when you put on your new pose pack, your purse disappears because it is also using mesh ID number 52, so you go back into Create Mode to edit your pose pack only to find that 52 is checked again!!? This here is the problem. Let me show you how to solve it.
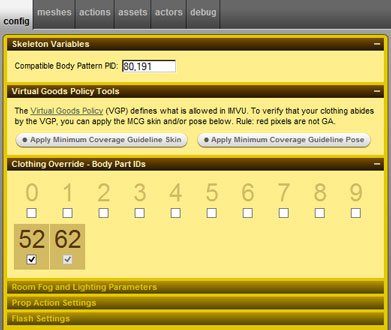
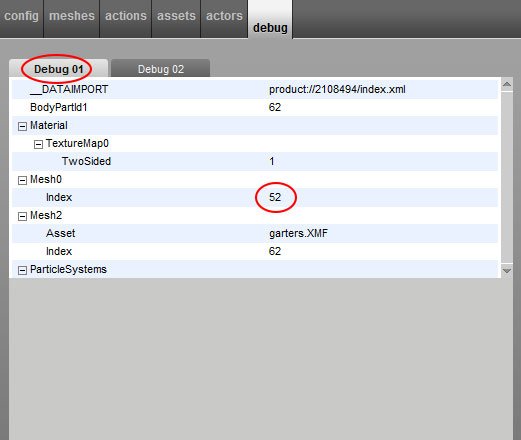
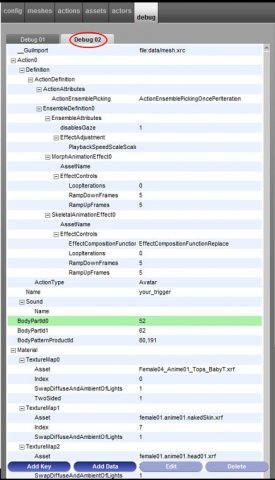
Ok, so you have your product all ready to go and the last thing you need to do is to get rid of that unwanted mesh ID number. Click over to the debug tab. Under the debug tab there is Debug 01 and Debug 02. Starting with Debug 01, find evey single instance of the number you want to get rid of, in this example it is 52. Mesh ID 62 is the number that I would like to use for this product.
Click on the number you want to get rid of and look to the bottom of the tab and click on the Edit button.
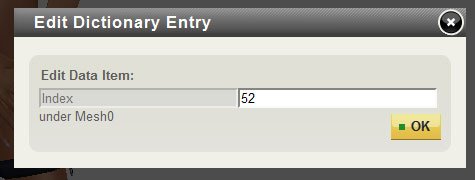
A window will pop up where you will change the offending number (52) to the number you want (62) and hit OK.
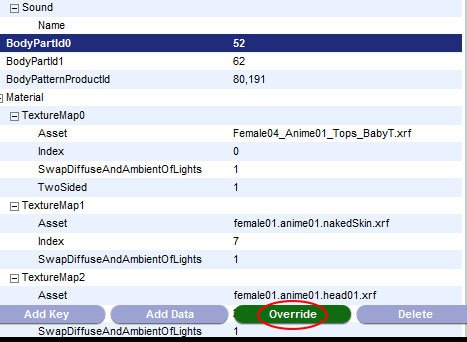
Click Debug 02 and you will find more offending numbers. Again click on the offending number.
Look to the bottom of the tab and click on "Override."
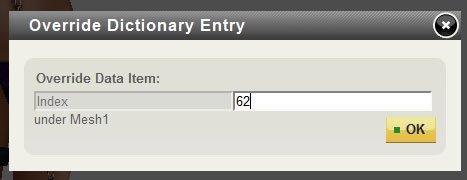
Again a window will pop up. For every single entry you find of the number you don't want, change it to the number you do want and hit OK.
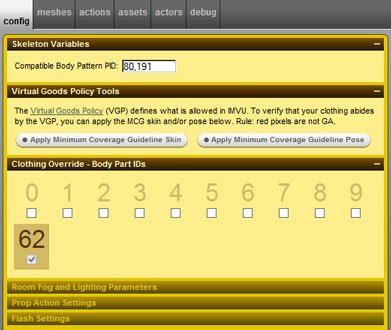
After you have gone through and changed all of the numbers, you can click back over to the config tab and your unwanted number is gone! But only if you got every single one
Word of advise. DO NOT UNCHECK THE NUMBER ON THE CONFIG TAB! If you do the bugs will show up and put the number back even if you do everything in the debug tab.
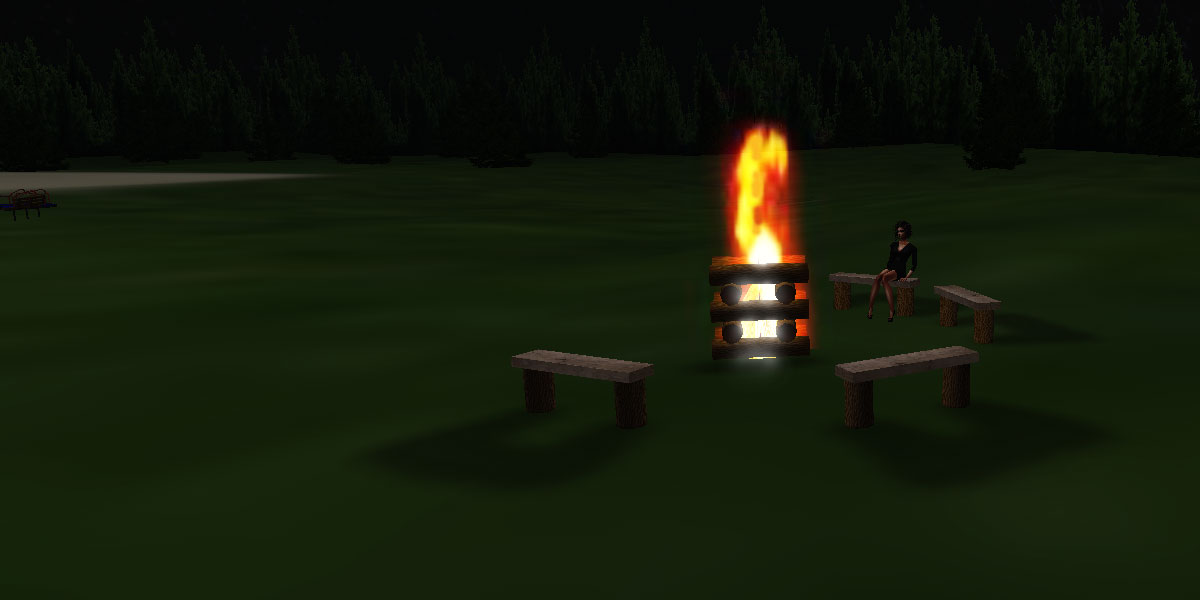
The video below shows you a step by step guide on how to make a particle stream that resembles fire. It is about 30 minutes long.
This is the image used in the video so you can follow along
test64.png
To save it on your computer, just right-click and select "save image as..."
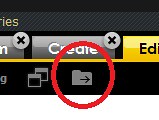
Save it to the project folder by clicking the icon and drag and drop.
One thing to remember when working in the debug panel is that you should not click on anything. This first value you input must be at the base level and not chained off of any other rule. Unfortunately, once you click on something, you can't unclick.
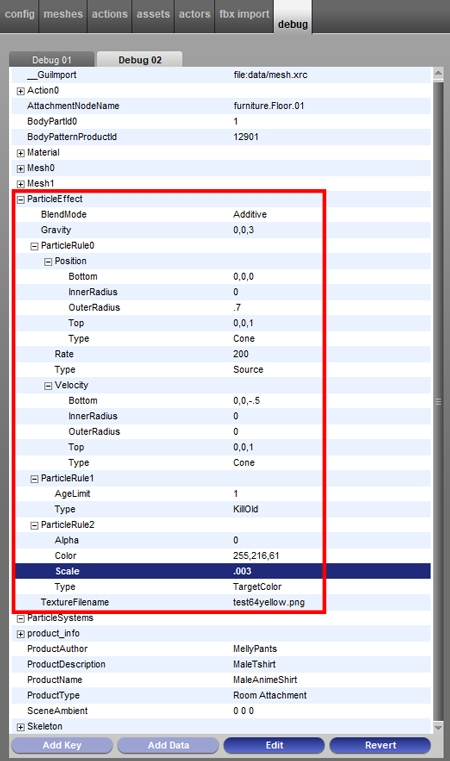
When you are done imputing all of your values, your panel should look like this:
Below are all of the values used in this tutorial. When you are adding new keys and data, remember to have the correct parent clicked. For example in the list below ParitcleEffect is the parent and BlendMode, Gravity, ParticleRule0, ParticleRule1, ParticleRule2, and TextureFilename are all children of that parent.
These are the available particle shapes used for both the Position key and the Velocity key.
Box: Takes two positions: these two positions are
opposing corners of the box.
BottomCorner 0,0,0
TopCorner 0,0,0
Type Box
Cone: Takes two positions: the "top" is the pointy
end of the cone, and the "bottom" is the blunt end.
The Inner and Outer radius are the radii of the blunt
end. (a nonzero inner radius produces a hollow cone)
Bottom 0,0,0
InnerRadius 0
OuterRadius 0
Top 0,0,0
Type Cone
Cylinder: Takes two positions which are endpoints
of the cylinder. Inner and outer radius work in the
same way as they do for cones and spheres.
Bottom 0,0,0
InnerRadius 0
OuterRadius 0
Top 0,0,0
Type Cylinder
Disc: Takes a centre point of the disc, a normal
vector which points away from the disc, and two radii
scalars.
InnerRadius 0
Normal 0,0,0
OuterRadius 0
Position 0,0,0
Type Disc
Line: Takes two positions: the endpoints of the line.
End 0,0,0
Start 0,0,0
Type Line
Plane: An infinitely large, flat plane.
Normal 0,0,0
Position 0,0,0
Type Plane
Point: A single geometric point.
Position 0,0,0
Type Point
Rectangle: A rhomboid plane. Takes a center point,
and two vectors that determine the center points of
the sides.
Position 0,0,0
Type Rectangle
u 0,0,0
v 0,0,0
Sphere: Takes a position that is the center of the
sphere, plus an inner and outer radius. If the inner
radius is nonzero, then the sphere is hollow.
InnerRadius 0
OuterRadius 0
Position 0,0,0
Type Sphere
Triangle: A simple triangle. Takes three positions
that are the corners of the triangle.
CornerA 0,0,0
CornerB 0,0,0
CornerC 0,0,0
Type Triangle
These are the additional particle rules to refine your particles speed, direction, and color.
Sink: Particles that come into contact with a
Sink are destroyed. The domain* describes the
shape of the sink.
SinkDomain
BottomCorner 0,0,0
TopCorner 0,0,0
Type Box (example)
Type Sink
KillOld: Destroys particles whose age is above some
number of seconds. The AgeLimit determines the distance
the particle travels before disappearing. If you wish
to fill a room with particles then leave the number
high, but if you want them close to the origin point,
reduce the AgeLimit to a lower number.
AgeLimit 0
Type KillOld
RandomAccel: Add a random velocity vector from the
domain given into each particle's velocity every frame.
This makes the particles appear to wander around a bit
instead of moving in parabolic arcs.
Acceleration
InnerRadius 0
OuterRadius 0
Position 0,0,0
Type Sphere (example shape)
Type RandomAccel
RandomDisplace: Add a random displacement vector from
the domain into each particle's position every frame.
This makes particles appear to twitch.
Displacement
InnerRadius 0
OuterRadius 0
Position 0,0,0
Type Sphere (example shape)
Type RandomDisplace
SpeedLimit: Describes minimum and maximum speeds for
all particles.
MaxSpeed 0
MinSpeed 0
Type SpeedLimit
TargetVelocity: Every frame, adjust the velocity of
all particles in the system to be closer to the
velocity given. "Scale" is the percentage of the
target velocity that is applied each second.
Velocity 0
Scale 0
Type TargetVelocity
TargetColor: Defines a target color. The actual
color is chosen at random. The Color data uses the
Decimal Code RGB values.
Alpha 0
Color 255,255,255
Scale 0
Type TargetColor
In this tutorial we learn how to make your own scaler products for IMVU. It is easier than you think!
Watch the video here:
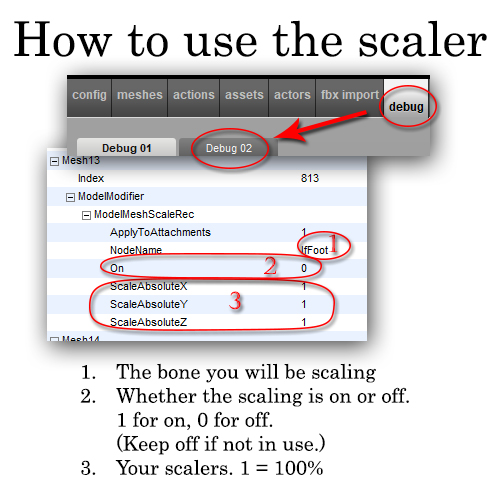
Here is what is needed to add to the debug2 panel:
(data) BodyPartId0 ###(pick something over 100)
(key) Mesh0
(data) Index ###(same as body part id)
(key) ModelModifier
(key) ModelMeshScaleRec
(data) ApplyToAttachments 1
(data) NodeName (pick a node from the list below)
(data) On 1
(data) ScaleAbsoluteX 1
(data) ScaleAbsoluteY 1
(data) ScaleAbsoluteZ 1
This is what the debug2 panel looks like
Here is a list of the bones (nodes) available for the IMVU avatars. These are what get scaled along with the attached meshes:
This tutorial is for someone who built their own room or furniture in IMVU and now want to add a custom animation or pose to it. Everything depends on how you name your nodes in your design program.
If you are unfamiliar on how you should set up your nodes, please visit this tutorial first.
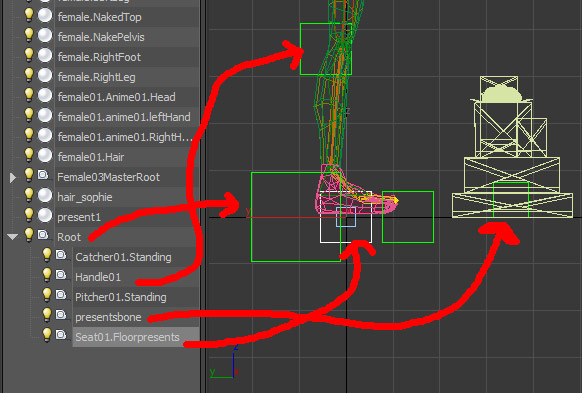
When you are building up your nodes in your design program make sure your default nodes are labeled "seat##.Standing" or "seat##.Sitting" for avatar standing and sitting respectively. For any nodes that will contain custom poses and animations will have to have a unique name, for example "seat05.Jumping" or "seat01.Floorpresents". It is important that the custom name is capitalised. Any additional bones (nodes) that you add for weighing you meshes to do not require any special naming format. Any mesh you would like to animate needs to be weighed to a bone.
When exporting your room or furniture from 3DS Max, remember to export the skeleton first (.xsf) then the mesh (.xmf) and furniture animations (.xaf) as they will need that skeleton to export properly. You export the avatar animation separately and use the avatar skeleton on export.
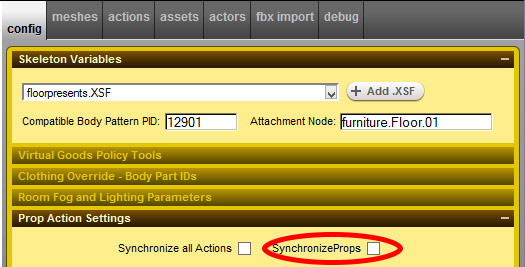
In create mode you will need to import your furniture or room skeleton on the config tab and make sure the prop synch box is checked if your avatar animation and furniture animation need to be synced. Otherwise the two might become out of sync while other avatars interact with your room or furniture.
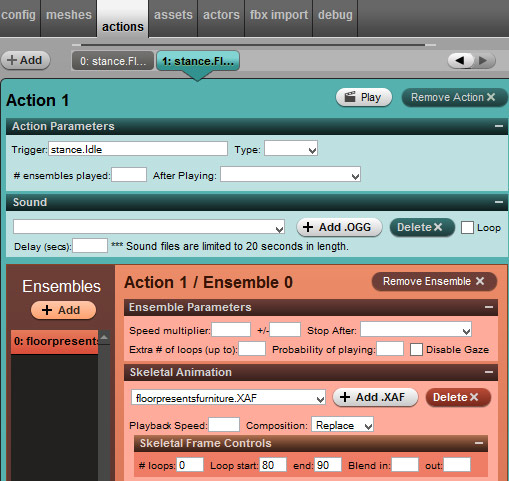
The actions tab is where you will add both your avatar and room or furniture animations. You can have your furniture triggered in one of three ways. You can have it node triggered, key word triggered, or autoplay. Below is the set-up for node triggered furniture and avatar animations, meaning they won't play until you click on a seat icon in client. If you want both the avatar and the furniture to animate on the same node, you still need two separate actions tabs. The avatar animation will trigger using the word "stance.Yournodename" and you need to make sure you add the correct animation file in that tab. The furniture will trigger using the word "stance.Yournodename-seat##". Again you need to make sure you input the correct file. If you don't remember what seat number your node name was, you may have to go back to your design program to figure it out. It is also import to remember to capitalise your node name in both your design program and in create mode.
For furniture to automatically animate as soon as it is loaded or when you enter a room, you need to add the trigger "stance.Idle" and whatever animation you upload to that tab will play automatically. Again, the word "Idle" needs to be capitalised. Because this is a furniture product, the Idle trigger will only work on furniture items. If you were working on an avatar product, the Idle would only work on the avatar.
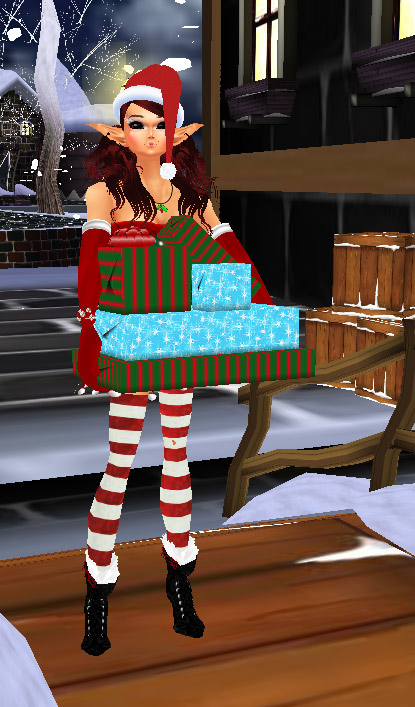
I hope this tutorial was helpful. Any questions or comments, feel free to leave them below. I also made a video, but forgot to add the Idle trigger, but it should be useful to watch.
On 10/18/18 I joined IMVUOfficial's twitch channel to do a quick tutorial on how to make a short dance. Matt (SecondHarvest) joined us and it was a lot of fun! Get the final product here: https://www.imvu.com/shop/product.php?products_id=43055313